Store skis only after they are clean and dry. For summer, leave a coat of storage wax on the bases. Dry ski boot shells, liners, and footbeds completely, put the boots back together, and fasten the buckles loosely. Then use a stable rack or shelf in a dry, temperate place where the bindings are not carrying the skis' weight.
Those steps matter more than whether the skis sit vertically or horizontally. A wall rack can free floor space, a freestanding rack can suit a rental, and an open shelf keeps boots together without sealing in moisture. Garage ski storage works only when the garage itself stays dry.
Prepare skis for storage
Use a short routine between ski trips and a more complete one at the end of the season.
Between trips
- Brush off snow and road grit.
- Wipe the bases, edges, and bindings with a soft cloth.
- Let the skis dry before strapping the pair together or putting it in a bag.
- Check for rust, loose or damaged parts, deep base damage, and lifting material around the tips or tails.
- Put the dry pair on its rack with the bindings clear of the supports.
Rossignol's care instructions, checked October 24, 2026, say to clean skis with a damp cloth and dry the metal parts and bindings. HEAD's ski-care guide, also checked October 24, says to dry skis after skiing. Those are simple habits that help prevent wet edges from sitting against straps, shelves, or another pair.
If you find rust or damage, deal with it before months of storage. Rossignol says rusty edges should be sharpened and damaged bases repaired. A ski shop can assess damage if you do not tune your own gear.
For off-season ski storage
After cleaning and drying the skis, apply storage wax to the bases and leave it in place. Rossignol specifically says to wax the base without scraping it. HEAD likewise says to leave storage wax unscraped until the next season. We checked both manufacturer pages on October 24, 2026.
Storage wax is not the finished surface you ski on. Scrape and brush the skis before the first day back. Follow the temperature and application directions supplied with your wax. Our ski wax temperature guide explains how maker-published temperature ranges differ.
HEAD's end-of-season storage guide, checked October 24, 2026, suggests putting dry skis base to base with loose straps. Keep the straps loose enough that they are not squeezing the ski shape or pulling the edges together. Do not change binding settings as part of a generic storage routine unless the binding manufacturer or a qualified technician tells you to do so.
Ski boot storage ideas and prep
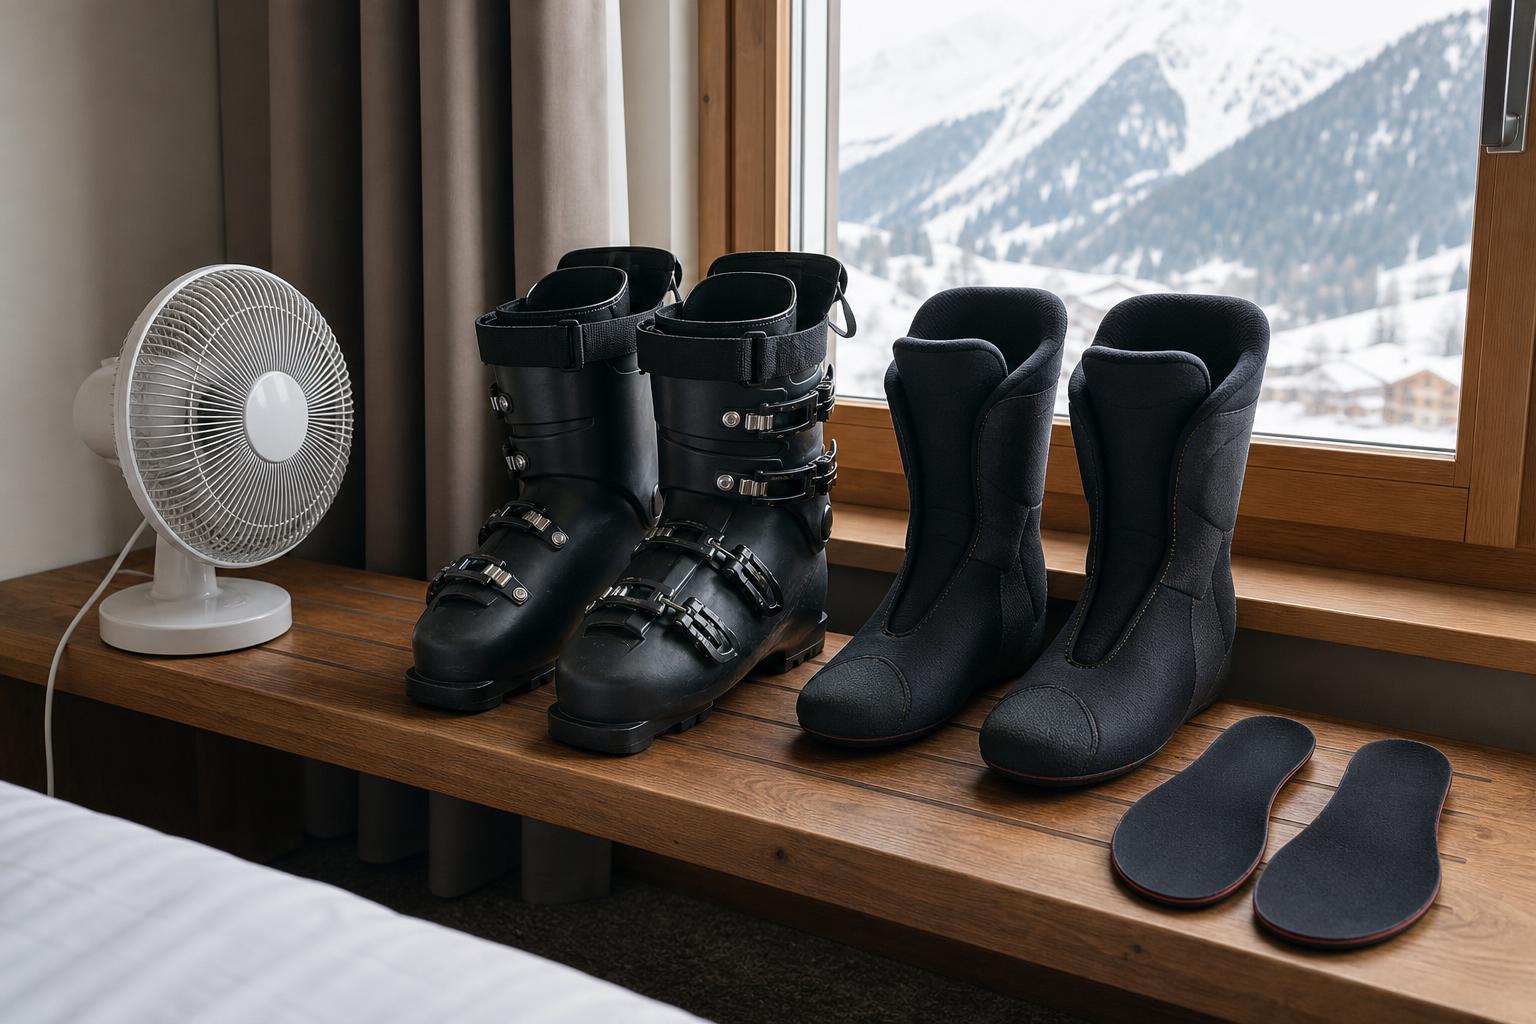
A closed boot bag is a transport container, not a drying cabinet. After the last ski day, take the boots out promptly and dry every removable part before putting the pair on a shelf.
- Open the power straps and buckles.
- Remove the liners and footbeds when they are damp.
- Wipe water and dirt from the shells.
- Dry the shells, liners, and footbeds separately with open airflow.
- Keep every part away from radiators, fireplaces, strong direct heat, and direct sun.
- Reinstall the dry footbeds and liners.
- Fasten the buckles lightly and place the boots upright on an open shelf.
Tecnica's boot drying and storage guidance, checked October 24, 2026, says boots should be completely dry and clean, loosely buckled, and stored somewhere cool and dry away from extreme heat, cold, and damp. Rossignol says to dry removed liners completely, reinstall them, and close buckles and straps on the first notch. That first-notch instruction is Rossignol's, not a universal setting for every boot.
For the full overnight routine, see how to dry ski boots. Leave a ski boot bag open until the boots are dry. If a bag remains your storage place, keep it off a damp floor and do not close it around wet liners.
Ski storage ideas for a home or garage
The right setup fits the room and keeps the gear stable. Start by checking moisture, sunlight, heat, and the wall or floor you plan to use. Then choose a ski rack rather than forcing the skis into a narrow gap.
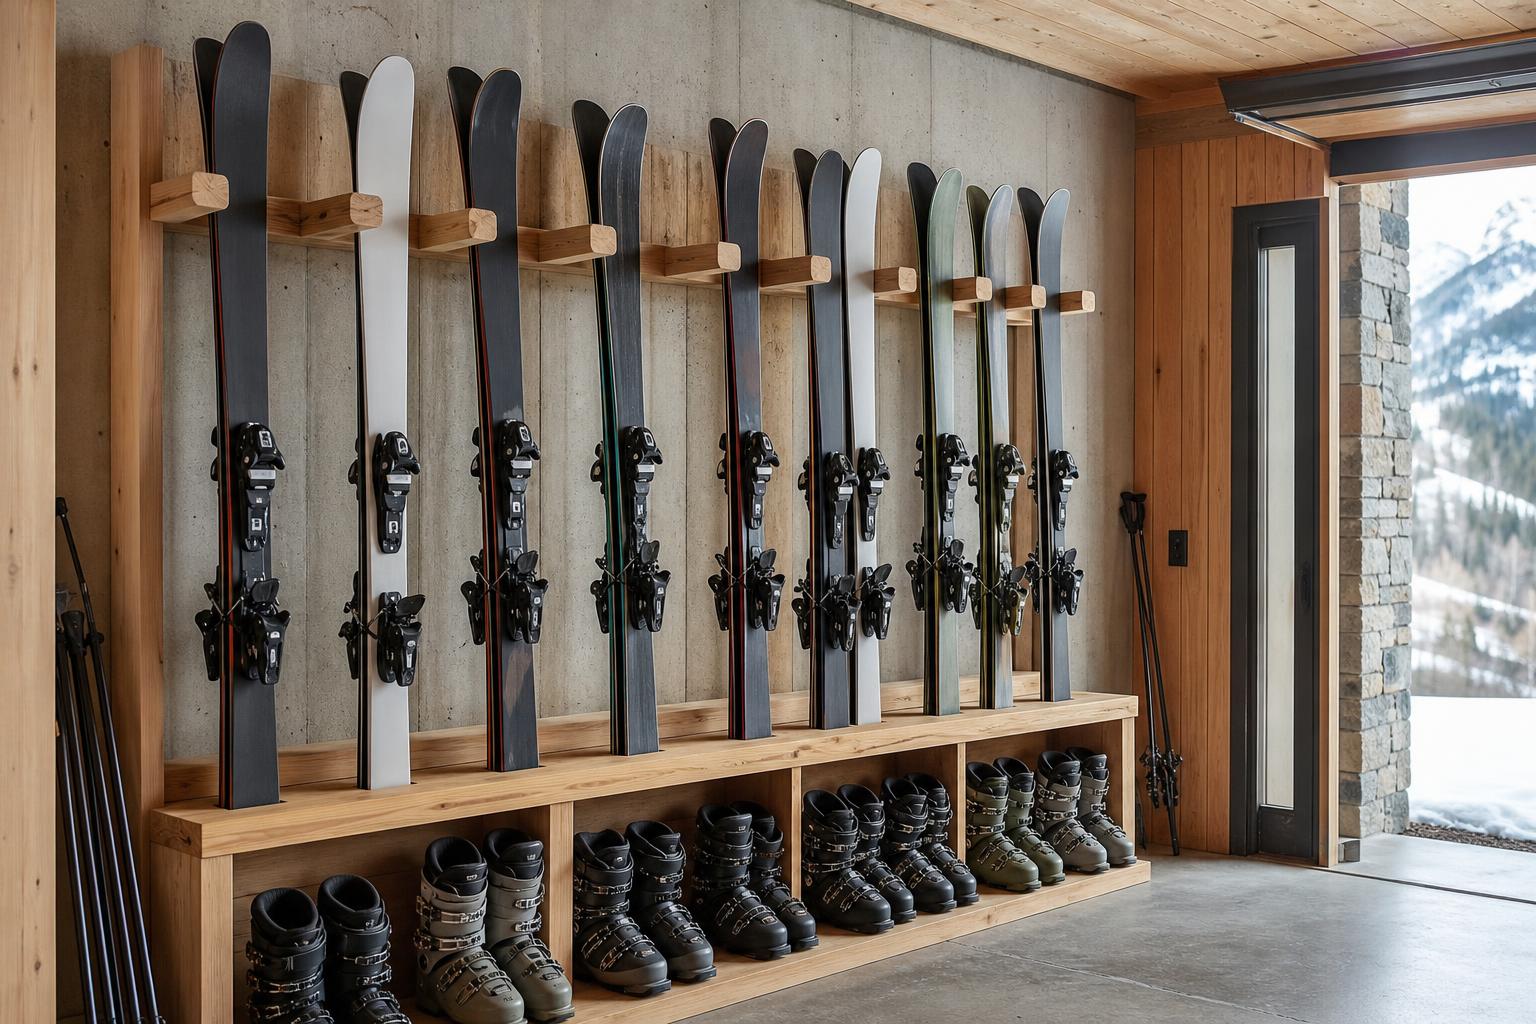
1. Vertical wall rack
A vertical ski rack uses wall height and leaves a small floor footprint. Each pair can sit in its own opening, with a lower rail or shelf keeping the tails from sliding. Position the upper support so it does not press against the bindings.
This layout makes sense in a narrow garage bay, mudroom, or utility room. Leave enough room to lift out one pair without scraping the neighboring edges. Keep the tails off any floor that collects meltwater.
2. Horizontal wall supports
Two or more aligned supports can hold skis flat along a wall. This works over a bench or in a room with more width than height. Pad the contact points and arrange the skis so the bindings do not carry the load.
HEAD's care guide, checked October 24, 2026, says horizontal or upright storage can work as long as the bindings are not under excessive pressure. Horizontal storage is therefore an organization choice, not a requirement for preserving the skis.
3. Freestanding rack
A freestanding rack avoids permanent wall holes and can move when the room changes. It needs a level location where a person, pet, car door, or rolling gear bin will not knock it over. Use separate openings so metal edges do not rest against neighboring topsheets.
This can be practical in a rental home, a shared gear room, or a garage where the usable wall changes seasonally. Stability depends on the actual rack design and the skis placed in it, so follow the rack maker's installation and capacity instructions.
4. Open gear locker
Combine a vertical or horizontal ski area with an open boot shelf, pole hooks, and a small bin for dry straps and tuning tools. Keep the wet zone separate from gloves and clean clothing. The boots need air around them, not a sealed cubby immediately after skiing.
A bench-height boot shelf also keeps heavy boots from falling out of an overhead cabinet. Put each pair together, buckle it loosely, and keep the liners seated only after everything is dry.
5. Dry ski bag for dust protection
HEAD's end-of-season guide says a ski bag can protect dry skis from scratches and dust. We checked that guidance October 24, 2026. Dry the skis and bag first, leave the storage wax on, and avoid stacking objects on the bindings inside the bag.
A bag does not make a damp basement or hot attic suitable. Rossignol says the storage place should be dry, temperate, and out of direct sunlight. HEAD warns against outdoor exposure and hot attics, and says a moisture-free garage wall can work.
Vertical vs. horizontal ski storage
Neither orientation wins by itself. Rossignol's official guidance, checked October 24, 2026, permits skis to be stored flat or vertically. HEAD also permits upright and horizontal storage when the setup avoids excessive pressure on the bindings.
Choose vertical storage when wall height is available and you want quick access to each pair. Choose horizontal storage when a long wall is open or when the rack can sit above a tuning bench. In either case:
- support the skis at stable contact points
- keep bindings clear of rack pressure
- separate sharp metal edges from adjacent gear
- avoid tight straps that squeeze the ski pair
- keep tips and tails away from foot traffic and car doors
- store only clean, dry gear
Do not lean loose skis in a walkway. A rack should keep a pair from sliding, rotating, or falling when you remove the pair next to it.
A simple DIY ski rack
A basic vertical DIY ski rack can be a wood backboard with paired dividers and a lower tail shelf. The project below is a layout concept, not an engineered load rating. The wall construction, fasteners, rack materials, and number of skis determine what the finished rack can hold.
Materials
- a straight wood board for the wall-mounted backboard
- smooth wood dowels or wood dividers for separate ski openings
- a lower board or shelf to locate the ski tails
- durable padding for the ski contact points
- screws and wall anchors selected for your wall and rack design
- a drill and suitable bits
- a level, tape measure, pencil, and stud finder where applicable
- sandpaper and a finish suitable for the room
Build steps
- Choose the location. Confirm that the area is dry and that the longest skis can be lifted in and out without hitting the ceiling, lights, garage door, or a vehicle.
- Lay out the pairs. Use your widest ski pair and its bindings to mark each opening. Leave hand room between pairs rather than copying a spacing number from a rack built for different skis.
- Plan the contact points. Place dividers where they hold the ski without pressing on the bindings. Add a lower shelf or stop so the tails cannot slide across the floor.
- Smooth and pad the rack. Round or sand exposed wood edges. Add padding anywhere the rack touches a ski edge, base, or topsheet.
- Choose the mounting method. Match the fasteners and anchors to the wall construction and the rack design. If you cannot verify the structure, ask a qualified installer rather than guessing.
- Mount it level. Check that the rack is secure before adding gear.
- Test access one pair at a time. Confirm that removing one pair does not drag its edges across another pair or push against a binding.
Board size alone does not establish a safe rack capacity. The wall assembly, fasteners, design, and installation method all matter, so use a documented plan or ask a qualified installer when you cannot verify them.
Protect ski tips and edges in storage
Dry edges before the skis reach the rack. Use padded rack contact points, keep pairs from rubbing, and leave room to remove one set without scraping another. A loose base-to-base strap can keep a dry pair organized, following HEAD's end-of-season guidance.
Tip covers help with a different moment: moving the skis through the house, garage, or parking lot. TipSox's official site, checked October 24, 2026, describes its products as ski tip covers that protect the tips and nearby edges while carrying skis. They do not cover the full edge or replace a dry rack, storage wax, or a padded ski bag. See the directory's TipSox page and ski tip cover guide for that limited use.
Before the next trip, remove the storage wax as directed, inspect the bases and edges, and check the bindings and boots for visible damage. If the skis need edge work, base repair, or binding service, take them to a qualified ski technician before skiing.