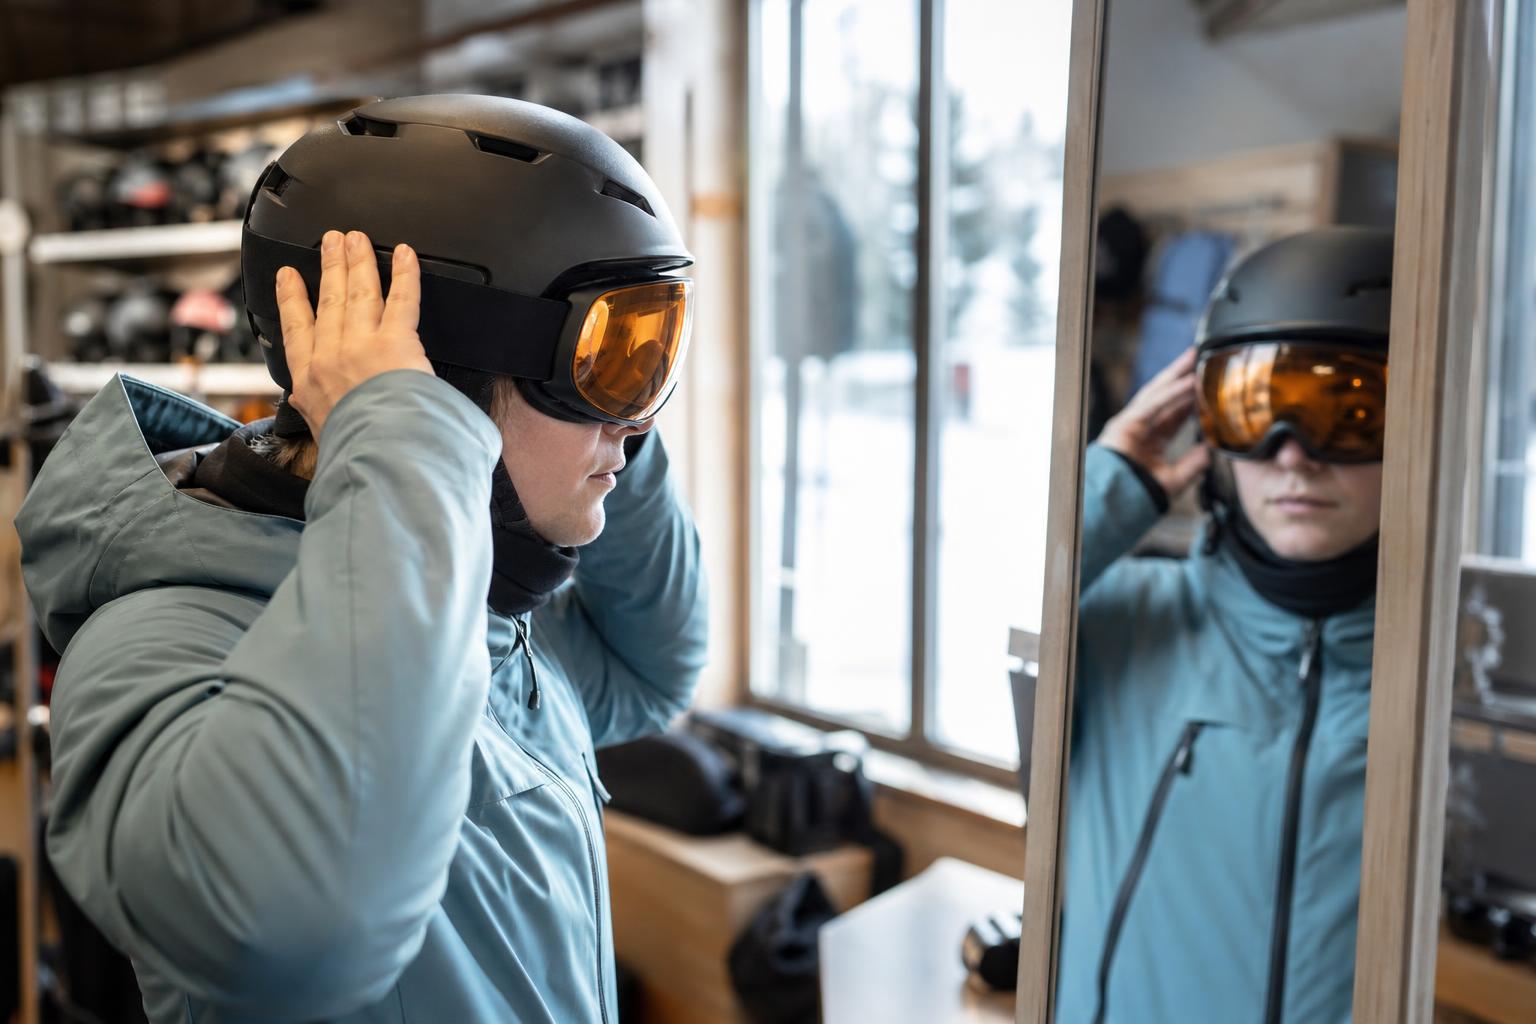
Choose ski goggle size by the seal on your face, not by the letter printed on the box. A correctly sized frame sits against your cheeks, nose, and forehead without a painful pressure point or an open gap. Try it with your ski helmet and, if you wear prescription glasses, with those exact frames.
Small, medium, and large are not universal measurements. One brand's medium can fit differently from another model with the same label. Start with the maker's face-size category, then let the complete try-on decide. The lens comes next: choose visible light transmission, or VLT, for the light you expect rather than choosing a tint because it looks dark.
Goggle size guide at a glance
| Size label | Useful starting point | Signs to change size or shape |
|---|---|---|
| Small or reduced size | Smaller adult faces, many youth faces, or anyone whose standard frame runs wide | Frame overlaps the helmet opening, foam reaches too far toward the ears, or the strap bottoms out before it holds |
| Medium | Average-width adult faces and the broadest range of common fits | Keep it only if the foam seals evenly and the frame stays comfortable with your helmet |
| Large or extra-large | Wider faces or skiers who feel pinched in standard frames | Frame leaves gaps at the nose or cheeks, touches the helmet awkwardly, or reduces head movement |
| OTG | Ski goggles over glasses, with extra interior room and space around the temple arms | Glasses touch the goggle lens, press at the temples or nose, or move when the goggles go on |
| Low bridge fit | Faces that get a gap around the nose with a standard bridge shape | Choose by the actual nose and cheek seal, not by the label alone |
This table is a fitting order, not a dimension chart. Ski goggles rarely use one transferable width measurement, and face shape changes the result. Giro's goggle guide, checked October 24, 2026, uses small, medium, and large categories while warning that sizing varies among brands and models. Giro also uses “RS,” or Reduced Size, for some smaller-frame models. Those are Giro's categories, not an industry-wide conversion.
How to choose your ski goggle size
Bring your helmet and glasses to the fitting. If you already own a balaclava or thin liner that sits under the helmet, wear it too. Do not judge a goggle while holding it against your face with the strap loose.
- Set the helmet first. Put it on in its normal position and fasten it. A loose or tilted helmet makes the goggle test meaningless.
- Place the goggles on your face. Center the frame over your nose. Pull the strap over the helmet and tighten it only until the frame stays in place.
- Check the full foam seal. Feel around both cheeks, the sides of the nose, and the forehead. You want continuous, light contact rather than a hard pinch in one area.
- Breathe through your nose. The frame should not squeeze the nostrils or push down when the helmet is fastened.
- Look side to side. Notice whether the frame blocks useful vision or shifts when your eyes and head move.
- Move like you are skiing. Turn your head, look down, and open and close your jaw. The goggles should stay seated without the strap digging into the back of the helmet.
- Leave the combination on for several minutes. A pressure point at the bridge, cheekbone, or temple can take time to appear.
Giro's guide says a proper fit forms a tight seal on the face and uses the adjustable strap around the head or helmet. The same guide links poor fit with shifting and greater fogging risk. We checked that manufacturer guidance on October 24, 2026.
Do not size up only to get a larger lens. A wide frame that cannot follow your face contour may leak air and leave a gap even when its field of view looks broad in your hand. Do not size down to force a seal either. Excess strap tension can hide the wrong shape while creating pressure across the nose and cheeks.
How ski goggles should fit
The frame should feel secure before it feels tight. Use these four checks:
- Even contact: the foam touches around the face instead of loading one cheekbone or the bridge of the nose.
- Stable position: the frame does not slide when you turn your head or look down.
- Open breathing: you can breathe through your nose without the frame pushing the nostrils closed.
- Useful view: the frame edge does not create a distracting obstruction when you look across the slope.
A small air gap at the nose is not something to fix by crushing the strap tighter. Try a different frame shape or a low bridge option. Likewise, a pressure line at both temples points to width or shape, not a need for more strap tension.
Children need the same checks. Do not buy a large frame for a child to “grow into” if it leaves an open seal now. Put the child's helmet on first, ask where the frame presses, and look for visible gaps while they turn their head. Youth and reduced-size labels help narrow the rack, but the face and helmet test still decides.
Common fit problems and what to change
A fitting problem often calls for a different frame shape rather than a different strap setting. Use the symptom to choose the next frame:
| What you notice | What to try next |
|---|---|
| Gap beside the nose | A frame with a different bridge shape or a low bridge fit |
| Pressure on the bridge of the nose | A larger opening or different nose contour, not a looser helmet |
| Pressure at both temples | A wider frame or a model with more flexible side sections |
| Gaps at the outer cheeks | A narrower frame or one with a more curved face profile |
| Frame reaches too close to the ears | A reduced-size or small frame |
| Goggles slide down | Recheck helmet position, then try a smaller or differently shaped frame |
| Strap reaches its limit | A model with the correct strap range for your helmet, not a forced fit |
Recheck the whole seal after each change. Fixing pressure at the nose can create a cheek gap, and a wider frame can collide with the helmet opening. One comfortable point does not make the full fit work.
If you buy online, check the seller's return conditions before removing protective film or wearing the goggles outside. Keep the packaging until you have tried the frame with your helmet, glasses, and face covering. A home mirror can show the forehead gap, but ask another person to inspect the cheek and temple seal while you turn your head.
Check helmet compatibility
A goggle can fit your face and still pair poorly with your helmet. Try both together every time you change either item.
Look at the top edge first. The helmet brim should meet the goggle without a large strip of exposed forehead. It should not overlap the frame, push the goggles down your nose, or block the top vents. Then check the sides. The helmet opening should not squeeze the goggle frame inward or pull the seal away from your cheeks.
Next, inspect the strap. It should sit in the helmet's intended strap channel or retainer without twisting. Tighten it enough to hold, then turn your head and look down. If the helmet moves the goggles every time you move, try another pairing.
Matching brand names can make the first try easier, but it does not replace fitting. Giro states that its goggles and helmets are designed for its “seamless integration” and warns that mixed brands can leave a gap. Smith makes a similar integration claim for the Sequence OTG with Smith helmets. We checked the Smith Sequence OTG specifications on October 24, 2026. Treat both statements as brand-specific design claims, not a promise that one combination fits every head and face.
Helmet venting matters because warm, moist air needs a route out. Do not cover the goggle's top vents with the helmet brim or a hat. Recheck the interface after adjusting the helmet fit system because that can change where the brim sits. For sizing and replacement on the helmet side, see the ski helmet guide.
Ski goggles over glasses: how OTG fit works
OTG means over the glasses. An OTG goggle has room for prescription glasses and shaping around the temple arms, but the label does not guarantee space for every eyewear frame.
Try the OTG goggle in this order:
- Put on the prescription glasses you will ski in.
- Put on and fasten the ski helmet.
- Pull the goggle frame straight over the glasses without catching an arm.
- Check both temples, the bridge of your nose, and the tops of your ears for pressure.
- Look through the full lens and confirm that the glasses do not touch its inner surface.
- Remove and replace the goggles once. Your glasses should stay aligned rather than lifting off your ears or sliding down your nose.
- Leave the setup on long enough to notice a slow pressure point.
Smith lists its Sequence OTG as a medium-fit goggle that fits over glasses. Its product page says a floating foam membrane reduces pressure from eyeglass temple arms. This is a useful example of what an OTG design can include, not a recommendation or a universal fit claim. We checked the page on October 24, 2026.
Large fashion frames can still exceed the available chamber. Measure them if the goggle maker publishes a maximum eyewear size, and bring the actual glasses to a shop when no limit is published. Your glasses should not wedge against the goggle lens. Contact between the two lenses can scratch surfaces and gives moisture another place to collect.
An optical insert is another route. It holds prescription lenses in a carrier made for a compatible goggle. Ask the goggle and insert makers about compatibility, then have the prescription made by a qualified optical provider. An insert changes the surfaces inside the goggle, so test the full setup for clearance and fogging before a full ski day.
Choose a lens tint by VLT
Visible light transmission is the percentage of visible light that passes through the lens. A higher VLT admits more light for dim conditions. A lower VLT admits less light for bright conditions. Lens color alone does not tell you the percentage, so read the published VLT for the exact lens.
Giro's VLT guide, checked October 24, 2026, explains the same relationship between percentage and available light. Use the forecast, expected cloud cover, and time of day to choose. If conditions may change, carry a compatible spare lens in a protective sleeve or choose a lens with a useful stated range.
S0 to S4 lens categories
ISO 18527-1:2021 is the current international standard titled Eye and face protection for sports use, Part 1: Requirements for downhill skiing and snowboarding goggles. Table 1 assigns five tint categories by mean luminous transmittance:
| ISO tint category | Visible light transmission |
|---|---|
| S0 | More than 80% |
| S1 | More than 43% through 80% |
| S2 | More than 18% through 43% |
| S3 | More than 8% through 18% |
| S4 | More than 3% through 8% |
We checked the ISO catalogue and the standard's Table 1 on October 24, 2026. The bands classify transmittance. They do not guarantee that every S2 lens will look the same, fit the same, or handle contrast the same way.
You may still see references to EN 174:2001, the older European ski-goggle standard. The European Commission's harmonised-standards decision, checked October 24, 2026, lists EN 174:2001 with a withdrawal date of November 11, 2024. Current European references use EN ISO 18527-1:2022. Do not treat an old EN 174 label as the current buying guide without checking the product's declaration and market requirements.
Use the categories as a comparison tool:
- Start higher on VLT when the forecast calls for flat, dim light.
- Start lower on VLT for strong sun.
- Read a photochromic lens's full range, since one percentage does not describe both states.
- Confirm the exact replacement lens fits your frame before ordering it.
Plan for changing conditions
A morning forecast and an afternoon forecast can call for different lens choices. If your goggles accept interchangeable lenses, compare the published VLT values for the installed lens and the spare. A meaningful gap between them gives you two distinct options. Two lenses with similar percentages may look different but cover much of the same light range.
Change the lens indoors, in the lodge, or in another dry sheltered place. Follow the frame maker's sequence so you do not force a latch, bend a lens, or touch the inner surface. Hold the lens by its edges. Put the removed lens straight into a clean protective sleeve rather than a jacket pocket with keys, grit, or a damp glove.
Before heading back out, inspect every attachment point and confirm that the lens sits evenly in the frame. Clear every ventilation opening that the lens change exposes. If the seal looks uneven or a latch does not close as designed, remove the lens and start again rather than pressing harder.
A spare lens is useful only if it reaches the hill clean and intact. Pack it where boots, a helmet, and other hard gear cannot flex it. At home, dry the frame and both lenses before returning either one to storage.
Photochromic vs. polarized ski goggles
Photochromic and polarized describe different jobs.
A photochromic lens changes tint as the light stimulus changes. Smith's photochromic technology page, checked October 24, 2026, says its lenses darken in bright sunlight and return toward a lighter state in shadow or indoors. ISO 18527-1 describes changeable-tint lenses with high and low transmittance states, and its photochromic test determines the categories in faded and darkened states. Compare the published VLT range rather than the word “photochromic” by itself.
A polarized lens filters reflected glare. Giro's goggle guide describes polarization as filtering horizontal light reflections to reduce glare. Polarization does not mean the tint changes, and photochromic does not mean polarized. Some lenses combine both technologies, but the product specification must say so.
Choose by the problem you want to solve. A broad photochromic VLT range can reduce lens changes as clouds move in and out. Polarization targets reflected glare. Neither label answers face fit, helmet compatibility, venting, or the suitability of the VLT range for a storm day. Read all of those specifications separately.
How to keep ski goggles from fogging
Fog forms when moisture condenses on a lens surface. Your practical job is to limit moisture inside the frame, preserve the inner anti-fog treatment, and keep air moving through the intended vents.
Before skiing:
- Start with dry goggles and dry face foam.
- Clear snow from the helmet and goggle vents.
- Arrange a balaclava or neck gaiter so your breath does not blow straight into the frame.
- Check that the helmet brim does not block the goggle's top vents.
While skiing:
- Keep the goggles on your face instead of parking them on a warm, damp hat or forehead.
- Brush snow away from vents without pushing it into the frame.
- Open helmet vents when the helmet maker's instructions and conditions allow.
- If you are overheating, reduce a clothing vent or layer before sweat saturates the foam. Our what to wear skiing guide covers an adjustable layer system.
Oakley's official product-care page, checked October 24, 2026, tells owners to keep goggles on the face to reduce fogging. Oakley warns that resting goggles on the forehead or hat reduces vent efficiency and exposes the interior to moisture from perspiration and melting snow.
If snow gets inside, stop in a sheltered place. Shake out loose snow, clear the vents, and gently blot remaining moisture with the maker-supplied microfiber bag. Give the moisture time to dissipate. Do not rub the wet inner lens, since manufacturers apply anti-fog treatment there.
Do not put goggles on a heater, car dashboard, or under a hand dryer. Concentrated heat can damage the lens, coatings, adhesives, or foam. If fogging continues with dry, clean goggles, inspect the seal and helmet interface rather than adding an unapproved chemical coating.
How to clean ski goggles
Clean the lens according to its maker's instructions. Coatings differ, so a cleaner allowed for one lens may be wrong for another.
For routine care, use this sequence:
- Shake off loose snow. Do not grind ice crystals across the lens.
- Let stuck snow melt, then shake away the water.
- Use a clean, soft microfiber cloth or the supplied goggle bag on the outer lens.
- Dab the inner lens only when necessary. Do not scrub it.
- Let the frame and foam air-dry completely before storage.
- Store the dry goggles in their protective bag or a case where the lens will not be crushed.
Giro's cleaning instructions, checked October 24, 2026, say not to use paper products, gloves, a shirt, or a jacket on the lens. Giro advises gently blotting the outside with microfiber, dabbing rather than wiping the inside, and avoiding household or chemical cleaners that could remove the anti-fog coating. Giro also says to let wet foam air-dry completely before storage.
Oakley's care instructions similarly say not to rub a wet inner lens, to clear the vents, and to blot moisture with the included bag. Oakley says to avoid paper products, ski gloves, and other abrasive materials, then air-dry the goggles before extended storage. Follow the instructions for the goggles in your hand when the two makers differ.
A hard or semi-rigid case gives the lens more protection in a crowded bag. For a flight or drive, put the dry goggles in that case before loading them into a ski boot bag. Use the bag only when the case fits without pressing against boots or a helmet. Our ski trip packing list puts goggles with the personal gear you keep accessible, and the day-trip ski checklist covers the shorter drive to the hill.